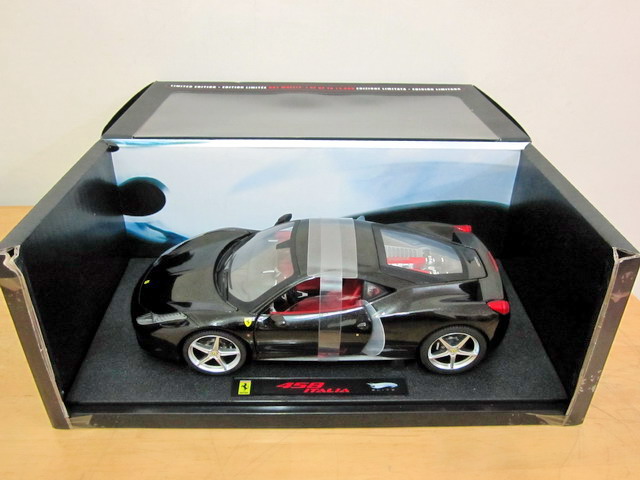
Some interesting IOPS benchmarks comparing with Equallogic PS6000XV

By admin, October 5, 2010 10:47 pm

The following is my own findings tested with IOmeter 2006 (4K, 100% Random, Read and Write tests). I ran the test from a VM and used as much as 10 workers to saturate that single PS6000XV.

  # of Harddisk RPM RAID Read, IOPS Write, IOPS
EQL PS6000XV 14 SAS 15K 10 5142 5120
Server1 4 SATA  7.2K 5 558 200
Server2 3 SCSI U320 10K 5 615 263
Server3 6 SCSI U320 10K 5 514 547
Server4 4 SCSI U320 15K 5 1880 820
Server5 4 SATA  10K 5 750 525

There are also two very interesting IOPS threads on VMware Communities, I am going to perform those tomorrow as well.

Unofficial Storage Performance Part 1 & Part 2


The VMTN IOMETER global options and parameters:
=====================================

Worker
Worker 1
Worker type
DISK
Default target settings for worker
Number of outstanding IOs,test connection rate,transactions per connection
64,ENABLED,500
Disk maximum size,starting sector
8000000,0

Run time = 5 min

For testing the disk C is configured and the test file (8000000 sectors) will be created by
first running – you need free space on the disk.

The cache size has direct influence on results. By systems with cache over 2GB the test
file should be increased.
LINK TO IOMETER:
http://sourceforge.net/projects/iometer/

Significant results are: Av. Response time, Av. IOS/sek, Av. MB/s
To mention are: what server (vm or physical), Processor number/type; What storage system, How many disks

Here the config file *.icf, copy it and save it as vmware.icf for IOMETER later. (Do not copy those the top and bottom lines containing ###############BEGIN or END###############)
####################################### BEGIN of *.icf
Version 2004.07.30
‘TEST SETUP ====================================================================
‘Test Description
IO-Test
‘Run Time
‘ hours minutes seconds
0 5 0
‘Ramp Up Time (s)
0
‘Default Disk Workers to Spawn
NUMBER_OF_CPUS
‘Default Network Workers to Spawn
0
‘Record Results
ALL
‘Worker Cycling
‘ start step step type
1 5 LINEAR
‘Disk Cycling
‘ start step step type
1 1 LINEAR
‘Queue Depth Cycling
‘ start end step step type
8 128 2 EXPONENTIAL
‘Test Type
NORMAL
‘END test setup
‘RESULTS DISPLAY ===============================================================
‘Update Frequency,Update Type
4,WHOLE_TEST
‘Bar chart 1 statistic
Total I/Os per Second
‘Bar chart 2 statistic
Total MBs per Second
‘Bar chart 3 statistic
Average I/O Response Time (ms)
‘Bar chart 4 statistic
Maximum I/O Response Time (ms)
‘Bar chart 5 statistic
% CPU Utilization (total)
‘Bar chart 6 statistic
Total Error Count
‘END results display
‘ACCESS SPECIFICATIONS =========================================================
‘Access specification name,default assignment
Max Throughput-100%Read,ALL
’size,% of size,% reads,% random,delay,burst,align,reply
32768,100,100,0,0,1,0,0
‘Access specification name,default assignment
RealLife-60%Rand-65%Read,ALL
’size,% of size,% reads,% random,delay,burst,align,reply
8192,100,65,60,0,1,0,0
‘Access specification name,default assignment
Max Throughput-50%Read,ALL
’size,% of size,% reads,% random,delay,burst,align,reply
32768,100,50,0,0,1,0,0
‘Access specification name,default assignment
Random-8k-70%Read,ALL
’size,% of size,% reads,% random,delay,burst,align,reply
8192,100,70,100,0,1,0,0
‘END access specifications
‘MANAGER LIST ==================================================================
‘Manager ID, manager name
1,PB-W2K3-04
‘Manager network address
193.27.20.145
‘Worker
Worker 1
‘Worker type
DISK
‘Default target settings for worker
‘Number of outstanding IOs,test connection rate,transactions per connection
64,ENABLED,500
‘Disk maximum size,starting sector
8000000,0
‘End default target settings for worker
‘Assigned access specs
‘End assigned access specs
‘Target assignments
‘Target
C:
‘Target type
DISK
‘End target
‘End target assignments
‘End worker
‘End manager
‘END manager list
Version 2004.07.30

####################################### ENDE of *.icf

今天樓下的F430安靜的像台HONDA

By admin, October 4, 2010 10:39 pm

今天終于拍到了它的全身﹐但今天的它是不是生病了﹖怎麼這麼安靜﹐哈哈。。。

IMG_2930

SAN HQ requires all ports on active controller to be up in order to work properly

By admin, October 4, 2010 4:15 pm

Thank you for contacting Dell / EqualLogic about this issue.

Yes, you are absolutely correct. 

For SanHQ to work properly the host running the SANHQ software must be able to ping each interface on the array.  The reason each port on the array needs to be accessible is due to the fact that the array will respond to snmp request on any randomly selected port on the array. 

Thus, if one or two network ports on your array goes offline for network related issue, SanHQ may or may not receive SanHQ updates during the expected interval if the problematic network ports are selected.

When Power OFF Master PC5448 Switch, we are no longer able to ping PS6000XV

By admin, October 3, 2010 12:19 pm

Can anyone offer some suggestions please or simulate to see if this could also happen in your environment? Thanks!

We are currently testing the final switch and array redundancy now, we have performed every possible fail scenarios (on Switch, Switch Ports, LAN on ESX, ESX hosts etc), they all worked perfectly as excepted, EXCEPT ONE OF THE following situation.

This is how we performed the test:

1. Putty into ESX 4.1 host Service Console, then issue “vmkping 10.0.8.8 -c 3000″ where 10.0.8.8 is our group IP, it can ping it without problem.

2. Turn OFF the master PowerConnect 5448 swtich (where we have two PC5448, master and slave, no STP and all LAG/VLAN etc has been setup properly according to the guide/best practice and we have connected all the redundancy paths correctly between switches and ESX Hosts), then we see in vCenter the ESX 4.1 host, it shows 2 out of 4 ports failed with a red cross in iSCSI VMKernel vSwitch.

3. The “vmkping 10.0.8.8 -c 3000″ stopped working until we Turn On the the master PowerConnect 5448 swtich again.
Please note the following special findings:

a. Even we cannot ping to 10.0.8.8 from the ESX Host during master switch is off, but in EQL group manager, it is still showing the ESX Host CAN STILL ESTABLISH iSCSI connection to it, and all the VM on that ESX Host is working with no problem, and we can still do VMotion between ESX Hosts even with the master switch turned off. So the iSCSI connection is not dead, just cannot be pinged somehow from ESX Host.

b. We also performed ANOTHER SIMILAR test BY turning off individual array iSCSI ports on master switch, we used OpenMange to connect to the master switch, and then TURN OFF the TWO ports connecting to PS6000XV, so to PS6000XV active controller, it shows again 2 out of 4 ports failed with a red cross.

Please note to EQL PS6000XV active controller, they see 2 out of 4 ports failed, yes, BUT we used TWO different method to have the same goal (1st one is to turn off the whole switch, the 2nd one is to turn off the iSCSI ports connecting to the array on switch) In the 2nd case, “vmkping 10.0.8.8 -c 3000″ IS STILL WORKING! How come the 1st situation doesn”t work? So the conclusion is “vmkping 10.0.8.8 -c 3000″ WILL ONLY NOT WORKING when WE TURN OFF the master switch.

Do not update firmware/BIOS from within ESX console

By admin, October 2, 2010 10:55 pm

Today I’ve learnt the hard way, and with the help of Dell ProSupport, I was able to rectify the problem that almost rendered my Poweredge R710 non-bootable.

  1. I saw there is a new BIOS update (FW 2.1.15, released on September 13, 2010) on Dell’s web site for Poweredge R710/R610 today. As described it fixed some serious problem that hang the server especially if you are using Xeon Westmere 5600 series, so it’s strongly suggested. Then I’ve upgrade the BIOS on R610 without any problem as it’s a Windows Server 2008 R2.
  2. The big problem came now, how to update BIOS/Firmware for servers running ESX? The answer is simple, take the host to Maintenance mode (VMotion all the VM off that host off course), then reboot, press F10 to go into Unified Server Configuration (USC), then setup IP and DNS server address, then use Update System, then use FTP to grab a bunch of updates directly from Dell’s FTP server, sounds easy right? Yes, it should, but what if Dell has not updated the catalog.xml which contains the latest BIOS path? Like us, today is Oct 2, 2010, and Dell still hasn’t update that important file, leaving every R710 having the existing and available BIOS same as 2.1.09, What the Hack! So you stuck, as there is no way you can easily update your BIOS, there is no Virtual Floppy anymore in iDRAC6, if there is, then I can simply boot into DOS and then attach another ISO contains the BIOS. Or shall I say I do not know where to download a bootable DOS image (ISO).
  3. Now I have boot my ESX again as USC method failed, I start to Google around and called Pro-Support, they suggest running the linux version of BIOS update programe.BIN directly from ESX console, ok, some source from Google saying it’s doable, then I use FastSCP to upload the BIN to /tmp, and then Putty into the server, then chmod u+x BIOS.BIN, then ./BIOS.BIN, after pressing “q”, it asked me if I want to continue to update BIOS (Y/N), I pressed Y, then after 5 seconds it stopped saying Update failed!
  4. Then the “BEAUTY” CAME! When I issue a reboot from vCenter, it just hang there viewing from iDRAC6’s console, “Waiting for Inventory Collector to finish” with many “……” counting, then after 20 mins, the server finally reboot itself, I tried reboot it again and it just hang again and this time, I used Reset from iDRAC6, then I found there is no more F10 available as it’s saying System Service is NOT AVAIABLE! What!!! Then Dell Pro-Support told me to go to iDRAC by Ctrl+E, then set Cancel System Service to YES, it will clear the fail state and bring back F10 after exit iDRAC. THIS IS DEFINITELY NOT GOOD! SOMETHING in the ./BIOS.BIN script MUST HAVE changed my server setting!!!
  5. I searched through Google and luckily I found Dell’s official KB.After OpenManage Server Administrator 6.3 is installed on ESX 4.1, when the system is rebooted, the system may not reboot until the Inventory Collector has completed. A message may be displayed that states “Waiting for Inventory Collector to Finish”. The system will not reboot for approximately 15 to 20 minutes.  Note: This issue can also affect the Server Update Utility (SUU) and Dell Update Packages (DUPs).The key to fix it is to issue command “chkconfig usbarbitrator off” to turn off usbarbitrator.
  6. Dell Pro-Support Level 2 engineer told me to type a list of things- “chkconfig –list” to show the Linux configure
    - “cat /etc/redhat-distro” to show the service console is actually RHEL 5.0, then I google around and found others also failed when directly updating server firmware as it’s not compatible with the general Redhat Linux may be.
    - “service usbarbitrator stop” to stop usbarbitrator service
    - “ps aux |grep usb” again to show usbarbitrator is no longer running
    - finally issue “chkconfig usbarbitrator off” to permanently disable usbarbitrator service.
  7. Finally I compared the original system config using “chkconfig –list” with my other untouched R710s, I found the only line has been changed is usbarbitrator 3:on, it should be 3:off!!! So the ./BIOS.BIN must have changed that in between and failed to update BIOS after that, and it didn’t roll back, so my system configuration has been changed! Dell’s KB 374107 didn’t specify and indicating the original ESX 4.1 system configure usbarbitrator is indeed with 3:off!

Why Dell still hasn’t update the catalog.xml in their FTP (both ftp.dell .com and ftp.us.dell.com), the BIOS has been released for two weeks? Anyway, I will wait till the end of October and try to use USC to update it again.

The following is quoted from the official Dell Update Packages README for Linux

* Due to the USB arbitration services of VMWare ESX 4.1, the USB devices appear invisible to the Hypervisor. So, when DUPs or the Inventory Collector runs on the Managed Node, the  partitions exposed as USB devices are not shown, and it reaches the timeout after 15 to 20 minutes.

This timeout occurs in the following cases:

* If you run DUPs or Inventory Collector on VMware ESX 4.1, the partitions exposed as USB devices are not visible due to the USB arbitration service of VMware ESX 4.1 and timeout occurs.

The timeout occurs in the following instances:

• When you start “DSM SA Shared Service” on the VMware ESX 4.1 managed node, it runs Inventory Collector. To work around this issue,  uninstall Server Administrator or wait until the Inventory Collector completes execution before attempting to stop the “DSM SA Shared Service”.

• When you manually try to run DUPs or the Inventory Collector on the VMware ESX 4.1 managed node while USB arbitration service is running.  To fix the issue, stop the USB arbitration service and run the DUPs  or the Inventory Collector.

To stop the USB arbitration service:

1. Use the “ps aux|grep” usb to check if the USB arbitration
service is running.
2. Use the “chkconfig usbarbitrator off” command to prevent the USB
arbitration service from starting during boot.
3. After you stop the usbarbitrator, reboot the server to allow the
DUPs and/or the Inventory collector to run.

Note: If you require the usbarbitrator, enable it manually. To enable the usbarbitrator, run the command – chkconfig usbarbitrator on.

Update: April 6, 2012

* The USB arbitration service of VMWare ESX 4.1 makes the USB devices invisible to the Hypervisor. So, when DUPs or the Inventory Collector runs on the MN, the partitions exposed as USB devices are not shown, and it reaches the timeout after 15 to 20 minutes. This timeout occurs in the following cases:

When you start “DSM SA Shared Service” on the VMware ESX 4.1 managed node, it runs the Inventory Collector.  While the USB arbitration service is running, you must wait for 15 to 20 minutes for the Inventory collector to complete the execution before attempting to stop this service, or uninstall Server Administrator.

When you manually run the Inventory Collector (invcol) on the VMware ESX 4.1 managed node while the USB arbitration service is running, you must wait for 15 to 20 minutes before the operations end. The invcol output file has the following:

<InventoryError lang=”en”>
<SPStatus result=”false” module=”MaserIE -i”>
<Message> Inventory Failure:  Partition Failure – Attach
partition has failed</Message>
</SPStatus><SPStatus result=”false” module=”MaserIE -i”>
<Message>Invalid inventory results.</Message>
</SPStatus><SPStatus result=”false”>

To fix the issue, stop the USB arbitration service and run the DUPs, or Inventory Collector.
Do the following to stop the USB arbitration service:

1. Use ps aux | grep usb to find out if the USB arbitration service is running.
2. To stop the USB arbitration service from starting up at bootup, use chkconfig usbarbitrator off.
3. Reboot the server after stopping the usbarbitrator to allow the
DUPs and/or the Inventory collector to run.

If you require the usbarbitor, enable it manually. To enable the usbarbitrator, run the command – chkconfig usbarbitrator on. (373924)

PS6000XV MPIO and Disk Read Performance Problems Again!

By admin, October 2, 2010 1:26 pm

A Quick question before even going into the following:

A Single Equallogic Volume IS LIMITED TO 1Gbps bandwidth ONLY at Max? (ie, The volume won’t send/receive more than 125MB/sec even there are MPIO NICs and iSCSI sessions connected to it) Does this apply to a single volume within just one member or it can break the 125MB/sec limit if the volume spans across 2 or more members? (for example 250MB/sec if the volume is spread over 2 members)

Summary (2 Problems Found)
a. PS6000XV MPIO DOESN’T work properly and limited to 1Gbps on 1 Interface ONLY on Server (initiator side)
b. 100% Random Read IOmeter Peformance is 1/2 of 100% Random Write


Testing Environment:

a. iSCSI Target Equallogic: PS6000XV 1 array member only, loaded with Latest Firmware 5.0.2 and HIT 3.4.2, configured as RAID10. (16 600GB SAS 15K Disks), HIT Kit and MPIO is installed properly, in MPIO, MSFT2005iSCSI BusType_0×9 is showing besides EQL DSM.

b. iSCSI Initiator Server: Poweredge R610 with latest firmware (BIOS, H700 Raid, Broadcom 5709C Quad, etc)

c. iSCSI Initiators: Using two Broadcom 5709C (one from LOM, one from add-on 5709C Quadcard), using Microsoft
software iSCSI Initiator (not Broadcom hardware iSCSI Initiator mode that is), No Teaming (I didn’t even install Broadcom’s teaming software as I want to make sure the teaming driver doesn’t load into Windows), I’ve also disabled all Offload features, as well as disable RSS and Mode Interruption, I have enabled Flow Control to “TX & RX”, as well as set Jumbo Frame MTU to 9000 (log in EQL group manager event that the initiator is indeed connecting using Jumbo Frame), each NIC has a different IP in the same sub-net as the EQL group IP.

d. Switches: Redundant PowerConnect 5448, setup according to the best practice guide, Enabled Flow Control, Jumbo Frame, STP with Fastports, LAG, Seperate VLAN for iSCSI, disabled iSCSI Optimization and tested redundancy is working fine by unplug different ports and switch off 1 of the switch, etc.

e. IOMeter Version: 2006.07.27

f. Windows Firewall has been turned off for Internal Network (ie, Those two Broadcom 5709C NICs sub-net)

g. There is no error at all showing after a clean reboot.

h. Created two Thick volume (each 50GB) on EQL and assigned iqn permission to the above two NICs iSCSI name.
Using HIT kit, we define MPIO to “Least Queue Depth”, even with just one member, we want to increase the iSCSI session to volumes on that member, so we also set Max sessions per volume slice to 4 and Max sessions per entire volume to 12. So right away we see the two NICs/iSCSI initiators connects volume as 8 paths (2 paths for each NICs to a volume x 2 NICs x 2 volumes)


IOMeter Test Results:

2 Workers, 1GB test file on each of the iSCSI volume.

a. 100% Random, 100% WRITE, 4K Size
- Least Queue Depth is working correctly as all Interface is showing different MB/sec.
- IOPS is showing impressive number over 4000.

b. 100% Random, 100% READ, 4K Size
- Least Queue Depth DOESN’T SEEM TO work correctly as all Interface is showing equal/balanced MB/sec. (lOOKS Like Round Robin to me, but the policy has been set to Least Queue Depth)
- IOPS is showing 2000, which is 1/2 of Random’s IPOS 4000, STRANGE!

c. 100% Sequential, 100% WRITE, 64K Size
- Least Queue Depth is working correctly as all Interface is showing different MB/sec.

d. 100% Sequential, 100% READ, 64K Size
- Least Queue Depth DOESN’T SEEM TO work correctly as all Interface is showing equal/balanced MB/sec. (lOOKS Like Round Robin to me, but the policy has been set to Least Queue Depth)
All of the above test (a to d), the 4 EQL Interface reached total of 120MB/s ONLY, somehow it’s FIXED to one NIC on R610 only and MPIO didn’t kick in even I waited for 5 mins, so all the time there is only one NIC participating in the test, I was expecting 250MB/s with 2 NICs as there are 8 iSCSI sessions/path to two volumes.

I even tried to disable the active iSCSI NIC on R610, as expected the other standby NIC kick in immedaitely without dropping any packets, but I just can’t get BOTH NICs to load-balance the total thoughput, I am not happy with 120MB/sec with 2 NICs. I thought Equallogic will load balance iSCSI traffic between connected iSCSI initiator NICS.
 

SAN HQ reports no retranmit error at all, always below 2.0%, one error found though saying one of the EQL interface is saturated at 99.8% sometimes. (is this due to least queue depth?)


Findings (again 2 Problems Found)
a. PS6000XV MPIO DOESN’T work properly and limited to 1Gbps on 1 Interface ONLY on Server (initiator side)
b. 100% Random Read IOmeter Peformance is 1/2 of 100% Random Write


I read somewhere on Google saying EQL’s limit on each volume is 125MB/s:

“Though the backend can be 4 Gbps (or 20 Gbps on PS6×10 series), each volume on the EqualLogic can only have 1 Gbps capacity. That means, your disk write/read can go no more than 125 MB/s, no matter how much backend capacity you have.”

“It turns out that the issue was related to the switch. When we finally replaced the HP with a new Dell switch we were able to get multi-gigabit speeds as soon as everything was plugged in.”
and I don’t think there is anything wrong with the switch setting as we also connect two other R710 using VMware and we constant seeing 200MB+, so there must be some setting problem on R610.

Could it be:
a. Set MPIO policy back to Round Robin will effectively use the 2nd NIC (path)?
b. Any setting need to be changed on Broadcom NIC’s Advanced setting? Enable RSS and MOde Interrupt again?

Anyone? Please kindly advise, Thanks!

 (Note: Equallogic CONFIRMED THERE IS NO SUCH 1Gbps limit per volume)


Update:

Something changed….for good finally!!!

After taking a shower, I’ve decided to change my IOmeter to VM instead of using physical machine.

FYI, I’ve install MEM and upgraded FW to 5.0.2, I think those helped!

1st time in history on my side!!! It’s FINALLY over 250MB during 100% Seq. Write, 0% Random and over 300MB during 100% Seq. Read, 0% Random.

1. Does IOPS looks good? (100% RAMDOM, 4K Write is about 4,500 IOPS and Read is about 4,000 IOPS 1 Member only PS6000XV)

2. Does the throughput look fine? I can increase more worker to get it to the peak 400MB/sec, 300MB/sec for Read and 250MB/sec for Write currently

Now if the above 1-2 are all ok now, then we only left with 1 Big Question.

Why doesn’t this work in physical Windows Server 2008 R2? The MPIO load-balancing never kick-in somehow, only failover worked.


Solution FOUND! (October 8, 2010)

C:\Users\Administrator>mpclaim -s -d

For more information about a particular disk, use ‘mpclaim -s -d #’ where # is t
he MPIO disk number.

MPIO Disk    System Disk  LB Policy    DSM Name
——————————————————————————-
MPIO Disk1   Disk 3       LQD          Dell EqualLogic DSM
MPIO Disk0   Disk 2       FOO          Dell EqualLogic DSM

That’s why, somehow the testing volume Disk 2 has been set with a LB policy as Fail Over Only, no wonder it’s always using ONE-PATH ALL THE TIME, after I’ve changed it to LQD, everything works like a champ!


More Update (October 9, 2010)

Suddently it doesn’t work again last night after rebooting the server, this is so strange, so I doubl checked switch setting, all the Broadcom 5709C Advanced Setting, making sure all offload are turned off and Flow Control has been set to TX only.

Please also MAKE SURE under Windows iSCSI Initiator Properties > Dell Equallogic MPIO, all of the active path under “Managed” is showing “Yes”, I had a case 1 out of 4 path was showing “No”, then somehow I can never get the 2nd NIC to kick in and I also received very bad IOmeter result as well as the FALSE annoying warning of “Priority ”Estimated
Time Detected” Duration Status Alerts for group your_group_name
Caution 10/09/2010 09:54 4 m 0 s. Cleared Member your_member_name TCP retransmit percentage of 1.7%. If this trend persists for an hour or more, it may be indicative of a serious problem on the member, resulting in an email notification.”

Update again October 9, 2010 10:30AM

Case not solved, still having the same problem, contacting EQL support again.


More Update (October 25, 2010)

I’ve found something new today.

I found there is always JUST ONE NIC taking the load in all of the following 1-9.
No matter if I install HIT Kit, with/without EQL MPIO or just simply Microsoft MPIO, still just 1 NIC all the time.

1. I’ve un-installed HIT kit as well as MPIO, then reboot.

2. Test IOmeter, single link went up to 100%, NO TCP-RETRANSMIT.

3. Install latest HIT Kit (3.4.2) again (DE-SELECT EQL MPIO, this is the last option, as I suspect there is some conflicts, and I will install it later at Step 5), Test IOmeter 2nd time, single link went up to 100%, NO TCP-RETRANSMIT.

4. Install Microsoft MPIO, reboot, MSFT2005iSCSIxxxx is installed correct and showing under DSM, and NO EQL DSM device found as expected. Test IOmeter 3rd time, single link went up to 100%, NO TCP-RETRANSMIT.

5. Under MPIO, found there is no EQL DSM device, so I re-install HIT kit again (ie, Modify actually) with the last option MPIO select (that’s EQL MPIO right?), reboot the server.

6. Now Test IOmeter the 4th time, single link went up to 100%, 1% TCP-TRANSMIT!!!
(IT SEEM TO ME HIT KIT’S EQL MPIO IS CONFLICTING WITH MS MPIO something like that)

7. This time, I’ve uninstall HIT kit again leaving Microsoft MPIO there, before reboot, Test IOmeter 5th time, single link went up to 100%, STILL 1% TCP-RETRANSMIT.

8. Test IOmeter 6th time, single link went up to 100%, NO TCP-RETRANSMIT. with previous Microsoft MPIO installed, Now Re-install HIT Kit again with all option selected and Reboot.

9. After reboot, Now Test IOmeter the 7th time, single link went up to 100%, STILL 1% TCP-RETRANSMIT!!!

I GIVE UP literally for today only  but at least I can say the MPIO is causing the high TCP-TRANSMIT and poor performance when using Veeam Backup SAN mode. I intend not to un-install HIT Kit and remove EQL MPIO PART ONLY, but leaving all other HIT KIT components selected, so at least I am not getting that horrible TCP-TRANSMIT thing which really affecting my server.

Btw, I don’t think it matters if one of my nic is LOM on-board and one of the nic is on Riser as I did disable one at a time (1st disable LOM, test IOmeter, then disable riser NIC, then test IOmeter)  and run IOmeter, still getting 1-2% TCP-RETRANSMIT with HIT KIT (EQL MPIO installed), THAT IS ONLY 1 ACTIVE LINK WHILE OTHER LINK HAS BEEN DISABLED MANUALLY, I AM STILL GETTING TCP-RETRANSMIT.


So my conclusion is “So there must be a conflict between EQL MPIO DSM and MS MPIO DSM on Windows Server 2008 R2.”

I belive EQL HIT Kit MPIO contains or having A BUG THAT DOESN’T WORK WITH Windows Server 2008 R2 MPIO? I think all other W2K3 or W2K8 SP2 R2 ALL working fine, just not with W2K8 R2.

Finally, my single link iSCSI NIC is working fine, no more TCP-Transmit ever, speed is in 600-700Mbps range during Veeam Backup and it tops my E5620 2.4Ghz 4 cores CPU to 90%, so I am fine with that.  (ie, Better a single working path than two non-working MPIO paths)


More Update (December 22, 2010)

So far I was able to try the followings.

1. I’ve updated Broadcom’s firmware to latest 6.0.22.0 from 5.x.
2. Then I’ve Re-installed (Modify, Added back) MPIO module from latest HIT.
3. I’ve run the 1st command mofcomp %systemroot%\system32\wbem\iscsiprf.mof, but not the 2nd as http://support.microsoft.com/kb/2001997 says the 2nd command mofcomp.exe %systemroot%\iscsi\iscsiprf.mof is actually related Windows Server 2003 and I am running Windows Server 2008 R2.

Still the same result, this time TCP RETRANSMIT is over 2.5%, still just one-link being used. (ie, no MPIO)

However, I discovered something new this time as well:

As soon as I decrease the Broadcom NIC’s MTU to 1500 from 9000 (ie, No Jumbo Frame) on Poweredge R610, TCP RETRANSMIT has been reduced to almost 0% (0.1%), but still no MPIO (ie, still just one-link being used)

So the conclusion to my finding is:

The TCP RETRANSMIT seemed related to Jumbo Frame setting now, any idea of where the possible problem could be?

If it’s the switch setting, then how come my VM on the same switch can load up to almost 460Mbps without any TCP retransmit?

Probably it’s still related to W2K8 R2 setting and HIT Kit’s MPIO conflicts.


More Update (December 23, 2010)

Today, I was able to test Broadcom iSCSI HBA Mode according to EQL’s insturction as well, particularly disabled NDIS mode, leaving iSCSI only, and also discover the target using specific NIC, then enabled MPIO.

Unfortunately, there is just still a single link even with iSCSI HBA Mode, strange!

One thing I noticed however is the CPU indeed decreased from 8% to 2%, but considering my CPU is rather powerful, the cost in CPU when using software iSCSI initiator can be ignored.


More Update (January 20, 2011)

With the help from local Pro-Support team, the MPIO mulfunction problem has been identified FINALLY! It’s due to the RRAS service running the on same server causing the routing problem which will somehow disable the 2nd path automatically and causing high TCP-Retransmit.

I was also able to get both NICs load to 99% for the whole IOMeter testing period with NO TCP-RETRANSMIT after disabled RRAS Service, first time in 3 months! :)


More Update (January 21, 2011)

More findings from local Pro-Support team:

The issue has nothing to do with EQ, below is my testing:

I tried to capture package of ICMP with WireShark.

iSCSI1 IP 192.168.19.28    metric 266
iSCSI2 IP 192.168.19.128   metric 265   ( all traffics go through this NIC )

Using a server 192.168.19.4 to ping 192.168.19.28, from WireShark, monitor iSCSI1, it just shows REQUEST package, monitor iSCSI2, it shows REPLY package. That means an ICMP come in from iSCSI1 and come out from iSCSI2. It was routed by RRAS.

After disabled RRAS, it come in and out from iSCSI1.

I’m checking on how to disable this 2 NICs routing in RRAS. I’ll update you later. Thanks.


More Update (January 24, 2011) – PROBLEM SOLVED, IT WAS DUE TO RRAS CAUSING ROUTING PROBLEM TO MICROSOFT MPIO MODULE

More findings from local Pro-Support team:

After many times tested, It works in my lab by following setting.

1.  Install HIT kit and connect to EQL.
2.  Check the 4 paths corresponding to EQL 4 ports from 2 NICs.
3.  In RRAS -> IPv4 -> Static Routes, add 4 entries by above 4 paths.
a)  Netmask is 255.255.255.255
b)  Gateway is IP of NIC.
c)  Metric is 1

After setting, it resumes normal. 

Reboot test, wait from RRAS start up. Check traffic, normal again.

Equallogic Firmware 5.0.2, MEM, VAAI and ESX Storage Hardware Accleration

By admin, October 1, 2010 6:43 pm

Finally got this wonderful piece of Equallogic plugin working, the speed improvement is HUGE after intensive testing in IOmeter.

100% Sequential, Read and Write always top 400MB/sec, sometimes I see 450-460MB/sec for 10 mins for a single array box, then the PS6000XV box starts to complain about all its interfaces were being saturated.

For IOPS, 100% Random, Read and Write has no problem reaching 4,000-4,500 easily.

The other thing about this Equallogic’s MEM script is IT IS JUST TOO EASY to setup the whole iSCSI vSwitch/VMKernel with Jumbo Frame or Hardware iSCSI HBA! 

There is NO MORE complex command lines such as esxcfg-vswitch, esxcfg-vmknic or esxcli swiscsi nic, life is as easy as a single command of setup.pl –config or –install, of course you need to get VMware vSphere Power CLI first.

Something worth to mention is the MPIO parameter that you can actually tune and play with.

C:\>setup.pl –setparam –name=volumesessions –value=12 –server=10.0.20.2
You must provide the username and password for the server.
Enter username: root
Enter password:
Setting parameter volumesessions  = 12

Parameter Name  Value Max   Min   Description
————–  —– —   —   ———–

reconfig        240   600   60    Period in seconds between iSCSI session reconf
igurations.
upload          120   600   60    Period in seconds between routing table upload
.
totalsessions   512   1024  64    Max number of sessions per host.

volumesessions  12    12    3     Max number of sessions per volume.

membersessions  2     4     1     Max number of sessions per member per volume.


C:\>setup.pl –setparam –name=membersessions –value=4 –server=10.0.20.2
You must provide the username and password for the server.
Enter username: root
Enter password:
Setting parameter membersessions  = 4

Parameter Name  Value Max   Min   Description
————–  —– —   —   ———–

reconfig        240   600   60    Period in seconds between iSCSI session reconf
igurations.
upload          120   600   60    Period in seconds between routing table upload
.
totalsessions   512   1024  64    Max number of sessions per host.

volumesessions  12    12    3     Max number of sessions per volume.

membersessions  4     4     1     Max number of sessions per member per volume.

Yes, why not getting it  to its maximum volumesessions=12 and membersessions=4, each volume won’t spread across more than 3 array boxes anyway, and the new firmware 5.0.2 allows 1024 total sessions per pool, that’s way way more than enough. So say you have 20 volumes in a pool and 10 ESX hosts, each having 4 NICs for iSCSI, that’s still only 800 iSCSI connections.


Update Jan-21-2011

Do NOT over allocate membersessions to be greater than the available iSCSI NICs, I encountered a problem that allocating membersessions = 4 when I only have 2 NICs, high TCP-Retransmit starts to occur!

To checkup if Equallogic MEM has been installed correctly, issue

C:\>setup.pl –query –server=10.0.20.2
You must provide the username and password for the server.
Enter username: root
Enter password:
Found Dell EqualLogic Multipathing Extension Module installed: DELL-eql-mem-1.0.
0.130413
Default PSP for EqualLogic devices is DELL_PSP_EQL_ROUTED.
Active PSP for naa.6090a078c06ba23424c914a0f1889d68 is DELL_PSP_EQL_ROUTED.
Active PSP for naa.6090a078c06b72405fc9b4a0f1880d96 is DELL_PSP_EQL_ROUTED.
Active PSP for naa.6090a078c06b722496c9c4a2f1888d0e is DELL_PSP_EQL_ROUTED.
Found the following VMkernel ports bound for use by iSCSI multipathing: vmk2 vmk3 vmk4 vmk5

 One word to summarize the whole thing: “FANTASTC” !

 More about VAAI from EQL FW5.0.2 Release Note:
 

Support for vStorage APIs for Array Integration

Beginning with version 5.0, the PS Series Array Firmware supports VMware vStorage APIs for Array Integration (VAAI) for VMware vSphere 4.1 and later. The following new ESX functions are supported:

•Hardware Assisted Locking – Provides an alternative means of protecting VMFS cluster file system metadata, improving the scalability of large ESX environments sharing datastores.

•Block Zeroing – Enables storage arrays to zero out a large number of blocks, speeding provisioning of virtual machines.

•Full Copy – Enables storage arrays to make full copies of data without requiring the ESX Server to read and write the data.

VAAI provides hardware acceleration for datastores and virtual machines residing on array storage, improving performance with the following:

•Creating snapshots, backups, and clones of virtual machines

•Using Storage vMotion to move virtual machines from one datastore to another without storage I/O

•Data throughput for applications residing on virtual machines using array storage

•Simultaneously powering on many virtual machines

•Refer to the VMware documentation for more information about vStorage and VAAI features.


Update Aug-29-2011

I noticed there is a minor update for MEM (Apr-2011), the latest version is v1.0.1. Since I do not have such error and as a rule of thumb if there is nothing happen, then don’t update, so I won’t update MEM for the moment.

Finally, I wonder if MEM will work with vSphere 5.0 as the released note saying “The EqualLogic MEM V1.0.1 supports vSphere ESX/ESXi v4.1″.

Issue Corrected in This Release: Incorrect Determination that a Valid Path is Down

Under rare conditions when certain types of transient SCSI errors occur, the EqualLogic MEM may incorrectly determine that a valid path is down. With this maintenance release, the MEM will continue to try to use the path until the VMware multipathing infrastructure determines the path is permanently dead .


中東猶長們的白色豪華坐駕Maybach 57s

By admin, September 28, 2010 10:29 pm

曾經在網上見過很多關於中東產油國紙醉金迷的圖片﹐還記得去年電影“色慾都市”中﹐迎接四位女主角的是阿布扎比酒店派來的四架Maybach頂級版的白色62s﹐一人一架﹐實在是太震撼了﹗

中東產油國大多數的富豪們都特別喜歡白色的豪華坐駕或者超跑﹐這可能與他們的服裝多數是白色有關﹐這點到是跟日本人不約而同。因為大和民族的超跑們都是以白色為主如GT-R﹑2000GT﹑NSX等﹐甚至連日本的法拉利Testarossa﹑F430等也清一色都是白色為主。

曾經在香港中區見過幾次Maybach 57/62的真身﹐尤其是“神棍”和“大劉”的那兩台﹐真車足足有6米長﹐氣勢的確非凡。

Autoart 白色的Maybach 57s這次真令人等得脖子都長了﹐足足超過兩個年頭﹐終于這個星期突然無聲無息靜悄悄地推出了。拿到後才發現白色並不是包裝盒上的那種純白色﹐而是金屬珍珠白﹐另外車窗也不是透明的﹐而是太陽濾鏡的那種透明黑色﹐這反而份外滲透著那份神秘的阿拉伯感覺。

1/18 Autoart Maybach 57s – White

IMG_2929

Import VM from previous VMware ESX versions into vSphere ESX 4.1

By admin, September 19, 2010 12:38 am

The following method proved to work even for pre-vSphere ESX servers (e.g., Dinosaurs like 2.5.4) vmdk files and same methodology also worked for True Image Server images.

Steps:

11. Use Veeam’s great free tool FastSCP to upload the original.vmdk file (nothing else, just that single vmdk file is enough, not even vmx or any other associated files) to /vmfs/san/import/original.vmdk. In case you didn’t know, Veeam FastSCP is way faster than the old WinSCP or accessing VMFS from VI Client.

2. Putty SSH into ESX host and change su -, then cd to directory /vmfs/san/import/, then  issue the command “vmkfstools -i original.vmdk www.abc.com.vmdk”

(note: Of course, you can use “-d thin” means thin provisioning, but I won’t recommend it as it’s waste of time and takes 2-3 times longer to convert to version 7, you will see why later)

I would also suggest DO NOT remove the original.vmdk until you have successfully completed the whole migration process.

3. Create a new VM as usual (for example, www.abc.com), when the wizard asked for disk size, just put 1GB (it’s going to be overwritten anyway later) . For best performance, select VMXNET3 during the configuration. (We shall add PVSCSI later, see step 5.)

Now, go back to putty, simply issue “mv www.abc.com* /vmfs/san/www.abc.com/”, it will ask you if you want to overwrite the two default files (www.abc.com.vmdk and www.abc.com-flat.vmdk), say yes to both.

4. Now right click and select Re-config (you must do this, or your VM won’t boot), Select everything and then change everything, including Windows License and Workgroup name, time, etc. Then you can boot this VM and login as usual.  Btw, you will find network is not ready as it’s DHCP, you can change to static IP later, after login, VM sysprep will do all the trick for you and it will also reboot itself and re-configure something more.

5. In order to have ESX 4 newly added PVSCSI for your disk controller, you will need to Add a new disk of say 10MB  and MUST choose a Virtual Device Node between SCSI (1:0) to SCSI (3:15) and specify whether you want to use Independent mode, then change the disk controller to PVSCSI, while keeping the original disk as whatever it is for now.

If you try to add PVSCSI to disk11 controllr without boot the VM, then you will get a famous blue screen BSOD as you haven’t installed or updated the VMware Tools for PVSCSI. Boot the VM, login and let VMTools to install all the necessary drivers for you including PVSCSI and VMXNET3.

Details see:
http://xtravirt.com/boot-from-paravirtualized-scsi-adapter
http://www.vladan.fr/changement-from-lsilogic-paralel-into-pvscsi/

Official from VMware (KB Article: 1010398)

Now shutdown your VM again, go to the original disk controller and change it to PVSCSI and power again. You’ve got it! Simple as that!

Of course, there is always some reason you DO NOT want to use VMware PVSCSI
http://blog.scottlowe.org/2009/07/05/another-reason-not-to-use-pvscsi-or-vmxnet3/

6. You may also want to re-configure the VM using re-configure now, what you need now is to right click the VM and choose “Re-Configure”, but before doing so, you will of course also need to install the corresponding sysprep in Virtual Center first.

For example, install Windows 2003 Sysprep files, you can download the file from

http://www.microsoft.com/downloads/details.aspx?FamilyID=93f20bb1-97aa-4356-8b43-9584b7e72556

Instructions: Run the filename.exe /x and extract the files into a folder, within you will find deploy.cab, extra again to C:\ProgramData\VMware\VMware vCenter Converter\sysprep\svr2003 (This is for ESX 4.1 VMware Converter). You will also need to do the same for C:\ProgramData\VMware\VMware vCenter\sysprep\svr2003 if you want to use sysprep for w2k3 template deployment later.

Use sysprep to edit the computer name, re-enter the Windows activation code and other stuff if necessary.

Now Power-On the VM, and login, it will automatically use sysprep to upgrade everything for you, just relax and watch the whole magical thing to happen, it will reboot the server, once it’s done, the only last step is to change the Display Hardware Acceleration to Full.

7. That’s it! Not yet! After reboot, when I tried to re-configure the IP again, I found

“The IP address you entered for this network adapter is already assigned to another adapter ‘VMware PCI Ethernet Adapter’. The reason is ‘VMware PCI Ethernet Adapter” is hidden from the Network connections folder because it is not physically in the computer.”

Solution:

-         Select Start > Run.

-         Enter cmd.exe and press Enter. This opens a command prompt. Do not close this command prompt window. In the steps below you will set an environment variable that will only exist in this command prompt window.

-         At the command prompt, run this command:
set devmgr_show_nonpresent_devices=1

-         In the same command prompt run this command:
Start devmgmt.msc (press Enter to start Device Manager.)

-         Select View > Show Hidden Devices.

-         Expand the Network Adapters tree (select the plus sign next to the Network adapters entry).

-         Right-click the dimmed network adapter, and then select Uninstall.

-         Close Device Manager.

-         Close the Command Prompt

Actually you would want to Uninstall all the previous NIC Cards just to make sure and have a clear environment.

8. To change back to Uniprocessor for VM

According to Microsoft, “If you run a multiprocessor HAL with only a single processor installed, the computer typically works as expected, and there is little or no affect on performance.” But if you’re like me and just want to be absolutely sure that there won’t be issues, switching back to the uniprocessor HAL in Windows Server 2003 is pretty easy:

-         Make sure you have at least Windows Server 2003 Service Pack 2 installed.

-         Shut down the virtual machine.

-         Change number of virtual processors to 1

-         Power on the virtual machine.

-         In Windows, go to Device Manager -> Computer.

-         Right-click “ACPI Multiprocessor PC” and choose “Update Driver…“.

-         Select “No, not this time” option -> “Install from a list or specific location” -> “Don’t search. I will choose the driver to install.” -> select “ACPI Uniprocessor PC.”

-         Reboot the virtual machine.

9. VMware ESX 4 Reclaiming Thin Provisioned disk Unused Space

http://www.virtualizationteam.com/virtualization-vmware/vsphere-virtualization-vmware/vmware-esx-4-reclaiming-thin-provisioned-disk-unused-space.html

The summary of the solution is to use sdelete & Storage Vmotion on the virtual machine to free up that unused space.

That’s all!!! You have just successfully imported or migrated a VM from a previous old ESX version to the latest ESX 4.1 and this method should work for all ESX versions, and what’s best, you upgraded all your existing VM to VMware Version 7 with PVSCSI and VMXNET3 enhanced drivers that you can really take the benefits with technology like vStorage/VAAI/Veeam Change Block Tracking (CBT), etc.

That’s all, for more info about Import or Convert VM into ESX, see

http://blog.lewan.com/2009/12/22/vmware-vsphere-using-vmware-converter-to-import-vms-or-vmdks-from-other-vmware-products/

10. To extend disk in real-time without downtime for Windows Server 2003/2000. (Windows 2008 has the magic build, you can expand/strink the partition on the fly)

a. You can use Diskpart to extend any non-bootable partition (e.g. , D:\) on the fly. *Need to disable Page file first!!!
b. You can use Dell’s Extpart to extend bootable partition (e.g., C:\) on the fly under ONE CONDITION, the extended partition need to be RIGHT-BEHIND C:\ partition. (You can use Acronis Disk Director’s Rescue Media to do this)


Update:

I found sometimes when importing an old VMDK file or Acrnois image, the default disk controller is IDE, which you definitely need to change it to SCSI for much better performance.

Converting a virtual IDE disk to a virtual SCSI disk (KB Article: 1016192)

To convert the IDE disk to SCSI:
1.Locate the datastore path where the virtual machine resides. For example:

/vmfs/volumes/

2.From the ESX Service Console, open edit the primary disk (.vmdk) in a text editor.
3.Look for the line:

ddb.adapterType = “ide”

4.To change the adapter type to LSI Logic change the line to:

ddb.adapterType = “lsilogic”

To change the adapter type to Bus Logic change the line to:

ddb.adapterType = “buslogic”

5.Save the file.
6.From VMware Infrastructure or vSphere Client
a.Click Edit Settings for the virtual machine.
b.Select the IDE virtual disk.
c.Choose to Remove the Disk from the virtual machine.
d.Click OK.

Caution: Make sure that you do not choose Remove from disk.

7.From the Edit Settings menu for this virtual machine:
1.Click Add > Hard Disk > Use Existing Virtual Disk.
2.Navigate to the location of the disk and select to add it into the virtual machine.
3.Choose the same controller as in Step 3 as the adapter type. The SCSI ID should read SCSI 0:0.

8.If a CDROM device exists in the virtual machine it may need to have the IDE channel adjusted from IDE 0:1 to IDE 0:0. If this option is greyed out, remove the CDROM from the virtual machine and add it back. This sets it to IDE 0:0.

PCCW 100Mbps Fiber Broadband

By admin, September 18, 2010 3:32 pm

Today PCCW come to my place to install PCCW 100Mbps FTTH Fiber Optics for FREE! :)

It did take the whole team of 4 staff 3 hours to finish the testing and QC, now I have two 100Mbps broadband at home, one is PCCW (Fiber), the other is HKBN (RJ-45) and both can reach upload/download at 100Mbps. During the setup, PCCW staff used WebUI login to HuaWei HG863 and I asked if there is any special tunning I can do to increase performance or add feature, the answer is Not Much.

Shortly after, I am going to use Netscreen 5GT dual-home feature to combined the two for load-balancing and failover.

IMG_2765

IMG_2766

IMG_2764


根據跨國業界組織「光纖到戶協會」(Fiber-to-the-Home Council)於二○一○年二月發表的資料顯示,本港光纖到戶及光纖到樓服務的住戶滲透率(即使用兩類服務的住戶佔住戶總數的比例)為百分之三十三,全球排行第三,僅次於南韓和日本。部分亞洲其他地區有關的住戶滲透率如下:

    地區   光纖到戶及光纖到樓的住戶滲透率
    ──   ───────────────
    南韓     百分之五十二
    日本     百分之三十四
    台灣     百分之二十四

Pages: Prev 1 2 3 4 5 6 7 ...295 296 297 ...328 329 330 Next