Category: Network & Server (網絡及服務器)

vSphere 5.0 is Released today by Surprise!

By admin, July 13, 2011 10:34 am

Today VMware announced the release of VMware vSphere 5.0 by surprise! The following is  some of the key features of this release: 

  • Convergence. vSphere 5.0 is the first vSphere release built exclusively on the vSphere ESXi 5.0 hypervisor architecture as the host platform.
  • VMware vSphere Auto Deploy. VMware vSphere Auto Deploy simplifies the task of managing ESXi installation and upgrade for hundreds of machines.
  • New Virtual machine capabilities. 32-way virtual SMP, 1TB virtual machine RAM, Software support for 3D graphics, and more.
  • Expanded support for VMware Tools versions. VMware Tools from vSphere 4.x is supported in virtual machines running on vSphere 5.0 hosts.
  • Storage DRS. This feature delivers the DRS benefits of resource aggregation, automated initial placement, and bottleneck avoidance to storage.
  • Profile-driven storage. This solution allows you to have greater control and insight into characteristics of your storage resources.
  • VMFS5. VMFS5 is a new version of vSphere Virtual Machine File System that offers improved scalability and performance, and provides Internationalization support.
  • Storage vMotion snapshot support. Allows Storage vMotion of a virtual machine in snapshot mode with associated snapshots.
  • vSphere Web Client. A new browser-based user interface that works across Linux and Windows platforms.
  • vCenter Server Appliance. A vCenter Server implementation running on a pre-configured Linux-based virtual appliance.
  • vSphere High Availability. VMware High Availability has been transformed into a cloud-optimized availability platform.

Here are some of the reasons why I’m excited about this: 

  • App Aware API.  This is the same API that has been used by Neverfail’s vAppHA and Symantec’s ApplicationHA products.  Now with 5.0, this API is publicly available.  This means anyone can craft a solution that allows for the monitoring of a application and interfacing with vSphere HA to restart the VM.  Couple this with the new vSphere Web Client’s ease of extensibility and you have the potential to do some great things.
  • Ever had DNS resolution cause you issues when using vSphere HA?  With 5.0, all dependency on DNS for vSphere HA has been removed!
  • IPv6 is now supported.
  • Logging.  There have been a lot of improvements to the log messages with vSphere HA.  This was done to make the log messages more descriptive than ‘unknown HA error’ and should help with identifying configuration issues.
  • Several user interface enhancements.  Now you can see more detailed state information about the hosts in your cluster and what role they play with vSphere HA.

The changes to the vSphere HA infrastructure now eliminates the primary/secondary constructs that existed in previous versions of vSphere.  Replacing that is a master/slave model.  In this model, one of the hosts is designated as a master, while the other hosts are designated as slaves.  The master coordinates most of the activities within the cluster and relays information to and from vCenter.

For now though, the reason why this is so great is that you no longer have to worry about details such as what hosts act as your primary nodes and which ones act as secondary nodes.  If you are installing vSphere HA in a blade chassis or making a stretched cluster, this is excellent news for you!

Heartbeat datastores is a feature that allows vSphere HA to utilize the storage subsystem as an alternate communication path.  Using heartbeat datastores allows vSphere HA to do things like determine the state of the hosts in the event of a network failure of the management network. Which brings up another enhancement to be excited about:  management network partitions are now supported in 5.0!

Finally, vSphere 5 has changed entitlements around CPU cores and memory use. The company has lifted licensing restrictions for cores per processor and RAM per host. It’s also eliminated the “advanced” version of vSphere plus, leaving just Essentials, Essentials Plus, Standard, Enterprise, and Enterprise Plus. vSphere 5 has also introduced a small change to the entitlement process around what is known as virtual memory or vRAM.

You must obtain new licenses to deploy VMware vSphere 5. Your existing VMware vSphere 4 licenses will not work on vSphere 5.

For more, please refer to What’s New in vSphere 5.0 and vSphere 5.0 Licensing, Pricing and Packaging Whitepaper as well as Compare VMware vSphere Editions.

A Huge Complex Upgrade Task Became A Piece of Cake with Virtualization and Equallogic!

By admin, July 11, 2011 10:31 pm

Today, I found Symmantec Antivirus has stopped updating its definition again due to space shortage, and I’ve tried everything to squeeze the last drop of space from my w2k3 without success, the original installation was back to mid-2004, at that time, 5GB is more than enough for the root C: dirve.

However after almost 7 years with all the patches and installed programs, it gradually filled up the C: drive to about 500MB left, so this leaves me no choice but to take the risk by using Acronis Disk Director to expand the partition.

First, I took a snapshot of the powered down VM, and then Edit the VM property and found the disk size has been gray out! Why? I don’t know, but after deleting the snapshot, I was able to expand the disk again, then took a snapshot again just to make sure.

Boot into Acronis Disk Director and I found there was no disk found due to SCSI controller was Paravirtual, changed to LSI Logic Parallel (LSI Logic SAS didn’t work) solved the problem, and the rest expanding the partition was just a piece of cake! I later found out there is no need to use Dell’s ExtPart utility as Acronis Disk Director did it all for me.

The interesting part was when Acronis Disk Director moving the blocks, it estimated 30 mins to re-arrange a 50GB partition, but at the end it only took less than 8 mins to complete the whole job, thanks to Equallogic’s fantastic 15K RPM Raid 10 IOPS capability! (Average Read/Write is about 2,000 IOPS, it’s quite high for two on-going parallel jobs)

Just to be cautions, if there is anything goes wrong, I still have the snapshot, the backup from Acronis True Image Server as well as my last resource Veeam backup, so it’s pretty safe to do the above with 3 different kind of backup on hand. Of course, I always forgot to mention there is the 4th hidden backup, it’s the Equallogic snapshot, but it’s the very last resource if all 3 backup methods failed to restore.

One more thing to take care of is the left over snapshot as I found the VM disk type automatically became Thick from Thin, this is due to the snapshot in the previous step, simply remove it will revert the disk to Thin again, nothing to worry about, but the removal process surprised me as it did took quite a long time to complete, if you know why, please let me know.

Boot up the VM and everything is back to order again. Back in the old days, when we perform a disk space upgrade, we often need to use Acronis True Image to clone all the partitions, then take out the old disks, normally raid 5 with 3 disks, and then insert 3 bigger size disks again and create a new raid 5 volume, finally restore it using CD-ROM, the whole process can take up to 4-5 hours to complete if you are lucky and need to cross your finger to pray no bad things happened!

Wow! I must admit that I love the benefits of virtualization and the magic of Equallogic more and more everyday!

A First Glance at Windows Small Business Server 2011

By admin, June 28, 2011 6:55 pm

1298956810_yzqgecvnournthk[1]Microsoft indeed has made the whole installation thing much easier than before!
Starting with the 6.5GB ISO download, it took about 2 hours to complete, then create a new VM with W2K8R2 as the OS type which SBS2011 is actually based on.

Shortly I found out the ISO won’t allow me to continue as I have less than 120GB of free space? Does it really require that much? OF COURSE NOT! (later found out it only took 22GB after the clean installation). In order to continue, I gave the VM 160GB with thin provisioned disk and 2 vCPU with 4GB Ram. The installation did take 2 hours to complete considering the ESX host is a pretty powerful and modern one, most of the time went to the part “Expanding and Installing Files”, although that process said only 30 mins.

After reboot, simply follow the installation wizard such as setting up the domain name, IP address (Must use a Private IP, note this, I think MS wants people to use SBS2011 in an Intranet behind the firewall/gateway only!), administrator username and password, then login via RDP. To my surprise, I found the default Administrator account got disabled! (why is this? Due to security reasons?) I have to manually enable it from the Active Directory User Console in order to use this account to copy files to the disk.

Wola…a new SBS2011 server is ready with all the latest version of IIS/SQL/Exchange and more…for only USD545, you got the Essentials Edition with 25 users and NO limit on CALs and if you need 75 users, then it’s only a bit more, USD1096, we can now say SBS has finally reached to a state that most of the SMBs can really afford and make the good use of it!

IIS 7.5 Intensive Learning Camp

By admin, June 22, 2011 7:54 pm

Today I’ve just upgraded my knowledge as one of my clients requires .NET 4.0 and I spent the whole day to make sure W2K8R2 is securely configured for individual client running .NET 4.0 applications. I found my knowledge from the old W2K3 days still applied very well, people say the foundation is the most important couldn’t be more true!

I found even with my existing knowledge, it’s particular easy to work on W2K8R2’s new feature, things like set ACL, configureIIS, FTP (didn’t like it, switched to Mozilla Server), .NET 4.0, as well as setting up FASTCGI PHP, we can finally say Windows Server has reached a status being called a reliable platform for hosting serious applications!

One thing I do not like is the new GUI, too many clicks, I prefer everything stays in one Panel using Tabs, may be there is a way to switch back to the classic GUI, if you know, please drop me a line, thanks!

How to Squeeze the Last Drop of Space from your Windows Server

By admin, June 16, 2011 1:20 pm

Today I’ve encountered a storage shortage problem during updating the Symmantec Antivirus on Windows Server 2003 VM, Symmantec kept complaining my server didn’t have enough space as first it requires downloading 300MB files on to C drive, then another 300MB or more for updating the files.

So I’ve removed all those hidden $service_pack_files (it’s absolutely safe to do so, of course if you do not need to roll back any of those hotfixs), I soon found out that I was still short of space, huh? Finally, I was able to squeeze another 100MB disk space by removing the all those older than 1 month Temporary ASP.NET Files under C:\WINDOWS\Microsoft.NET\Framework, do it both for version 1.1 and 2.0 folders.

Of course if that doesn’t work, I still can add some GB to the VMDK, then use Acronis Disk Director to shift the empty space to C partition (as I have D and E drives as well), boot up the VM, then use Dell’s ExtPart to extend it on the fly, but since the above works, I didn’t bother. Obviously if you only have a big C drive, then it’s much easier, just add more space to it and then extend on the fly if it’s W2K8 or use ExtPart if it’s W2K3.

I read it somewhere the best recommended free space for C drive is 10GB for Windows Server 2003 and 20GB for Windows Server 2008.

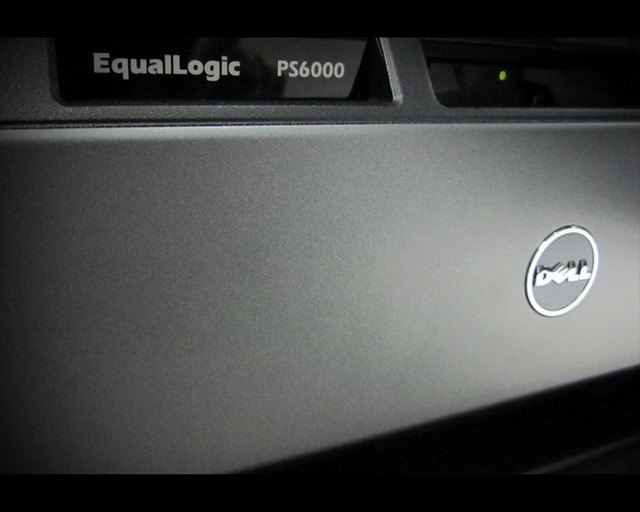
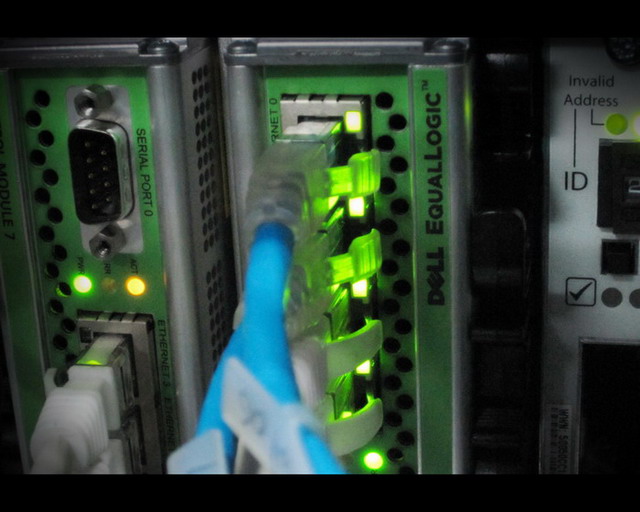
Nice Flashing Equallogic with LOMO Effect

By admin, June 14, 2011 2:32 pm

eql03

eql02

Limited Bandwidth / Speed Cap on VM is Easy!

By admin, June 4, 2011 10:46 pm

In order to prevent some abusive clients using all the bandwidth you’ve got, we need to have some kind of capping ability, it was done on our physical switch before, but since we are moving everything into virtual world, we now have a much better and flexible weapon on ESX 4.1. Btw, I don’t know why VMware got rid of the nice traffic shaping capability on individual VM like in the old days (ESX 2.5).

The step is actually very simple, just create a bunch of speed limit/capping port groups, I named them External – 1Mbps, External – 2Mbps, etc, setup VLAN or not is according to your own environment. Then go to each port group, click Traffic Shaping, then Enable, that’s it!

For example, you want to limit a VM with 1Mbps, what you need to set is 1000kbps for Average, 1000kbps for Peak (this eventually makes zero room for burst), 1 Byte for Burst if you like.

You may have more fun with Peak and Burst Size, for example, you can set Average to 500kbps (ie, 0.5Mbps), then you can give 1000kbps for Peak and 8000 Bytes for Burst, this means you actually allow the VM to go up to 1Mbps at peak in step of 64kbps burst size (ie, 64kbps, then burst adds up to 128kbps, then 256kbps until reaching the total peak of 1Mbps from the average 0.5Mbps)

Since the traffic shaping policy applies to each individual vNIC connecting to the same Port Group, this means if you have two vNICs on the same VM, then this VM will get TWICE the capped bandwidth than a VM with only one vNIC.

Finally, the traffic shaping is only for outbound only, if you need inbound, then you need to use vDS and in that sense you need to have Enterprise Plus version.

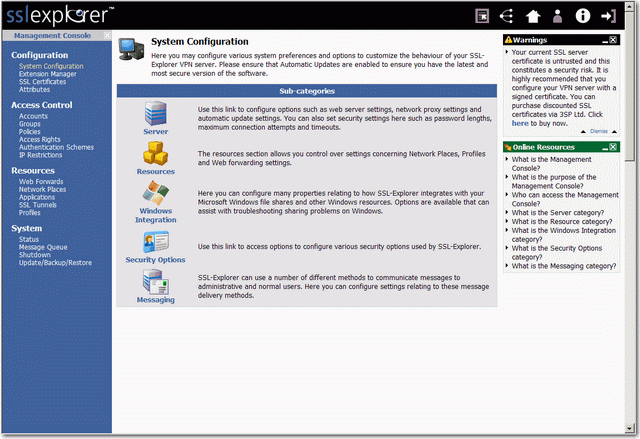
SSLExplorer Virtual Appliance: Couldn’t Get It Working

By admin, May 22, 2011 1:42 am

I thought I have found another nice and Free apps for SSL-VPN, SSLExplorer, now a Barracuda company, but it turns out it’s been stopped updating since 2008 and configuration part is too difficult.

1. Use VMware vCenter Converter 4.3 to import the virtual appliance (sslexplorer-1.0.0_RC17-x86.vmware.tgz) and converted it to VM Version 7 on ESX 4.1, it took about 15 seconds.

2. Open console, login as root with no password and configure the management interface with an INTERNAL IP address as public IP won’t work for some reason. (wasted 2 hours on this part)

3. Follow the wizard, start the sslexplorer service and the point your browser its IP address, configured many things until step 4.

4. Unable to publish sslexplorer port 80 & 443 via Untangle UTM. (wasted 2 hours on this part)

Finally Give up after 4 hours!

sslvpn 


Update May-22 3PM

Figured out why Step 2 doesn’t work, because I enter the wrong CIDR format for Network and my mind isn’t clear at all after 12AM! Damn!

It’s been explained clearly in the sslexplorer manual:

Network: Network address for this subnet in CIDR format. In the screenshot above a private subnet of 192.168.70.10/24 has been created. This is the same as using 192.168.70.10 with a subnet mask of 255.255.255.0 which will provide 256 hosts (254 useable addresses as 192.168.70.10 is the network address and 192.168.70.255 is the broadcast address).

What I did was 255.255.255.0/24 or 192.168.70.0/24 which is obviously wrong, the correct format for Network (or netmask) really should be 192.168.70.10/24, no wonder! Forgot the most basic could cost an eye or a leg in some case is true!

ANYWAY SOMEHOW STILL DOESN’T WORK!


Update May-22 5PM

The Network Setup Wizard contains A BUG FOR NETMASK PART, so I manually edited /etc/sysconfig/network-scripts/ifcfg-eth0

SIMPLY CHANGE NETWORK=192.168.70.10/24 to NETMASK=255.255.255.0

You can verify this by ping to Google, if it works, then it’s been correctly setup!

Finally, found the pre-built VM missing GCC compiler so can’t upgrade VMware Tools, as well as missing traceroute, strange!

I guess that’s all the fun and pain for a Free and Community based software, actually I start to like it which is gain pleasure from most dreadful painfulness: )

After that, everything worked, so simply give it a public IP and configure the rest will have your SSL-VPN ready in less than 10 mins. Of course putting it behind Untangle has no problem as I’ve got the NIC interface setup correctly this time!

So the best solution is not to struggle with the problem, but go to bed early! After a good night sleep, suddenly, BINGO!  Still No Pain No Gain, after almost 6 hours, it’s been trimed down to a 15-20 mins job.

Troubleshooting ICMP Ping on Windows 7

By admin, May 21, 2011 12:10 pm

I’ve encountered a very strange problem this morning that ping simply won’t work no matter what even after enabling the ICMP Ping on Windows 7 Ultimate firewall. Turn on the firewall log shows ICMP is being dropped, what? I did enable it in Windows Firewall, restart the VM with nothing changed.

After a close inspection, I found out why, by default Windows 7 Remote IP Address under Scope is set to Local Subnet only, no wonder, after change it to Any IP Address, life is back to normal!

Untangle is Finally Up and Running!

By admin, May 19, 2011 10:17 pm

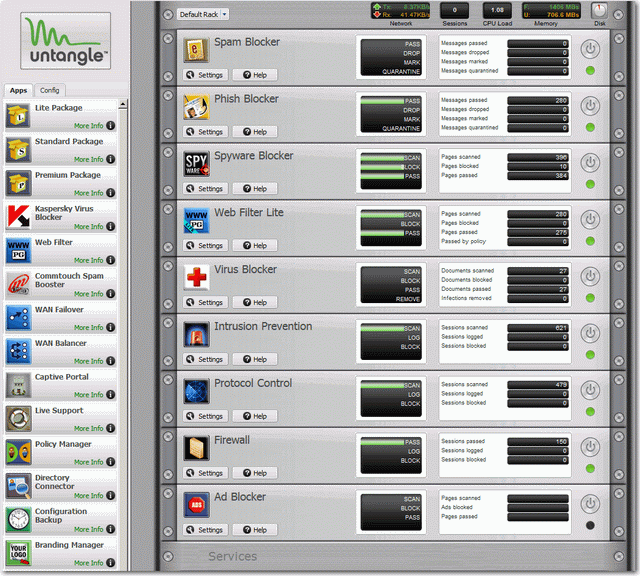
I really start to like this FREE virtual appliance from Untangle, it’s basically an UTM with almost everything you need, not to mention the nice looking GUI, it’s highly recommended for any SMB who seeks for an ultimate all-in-one network protection solution!

untangle

Pages: Prev 1 2 3 4 5 6 7 ...19 20 21 ...26 27 28 Next